Big day, closer to tear down

Today was a big day of getting a lot done with the fabrication, in actuality the fabrication part is just about complete, just need to start tear down, complete all the welding, sand blast the chassis and other bare mild steel parts that have started to rust.

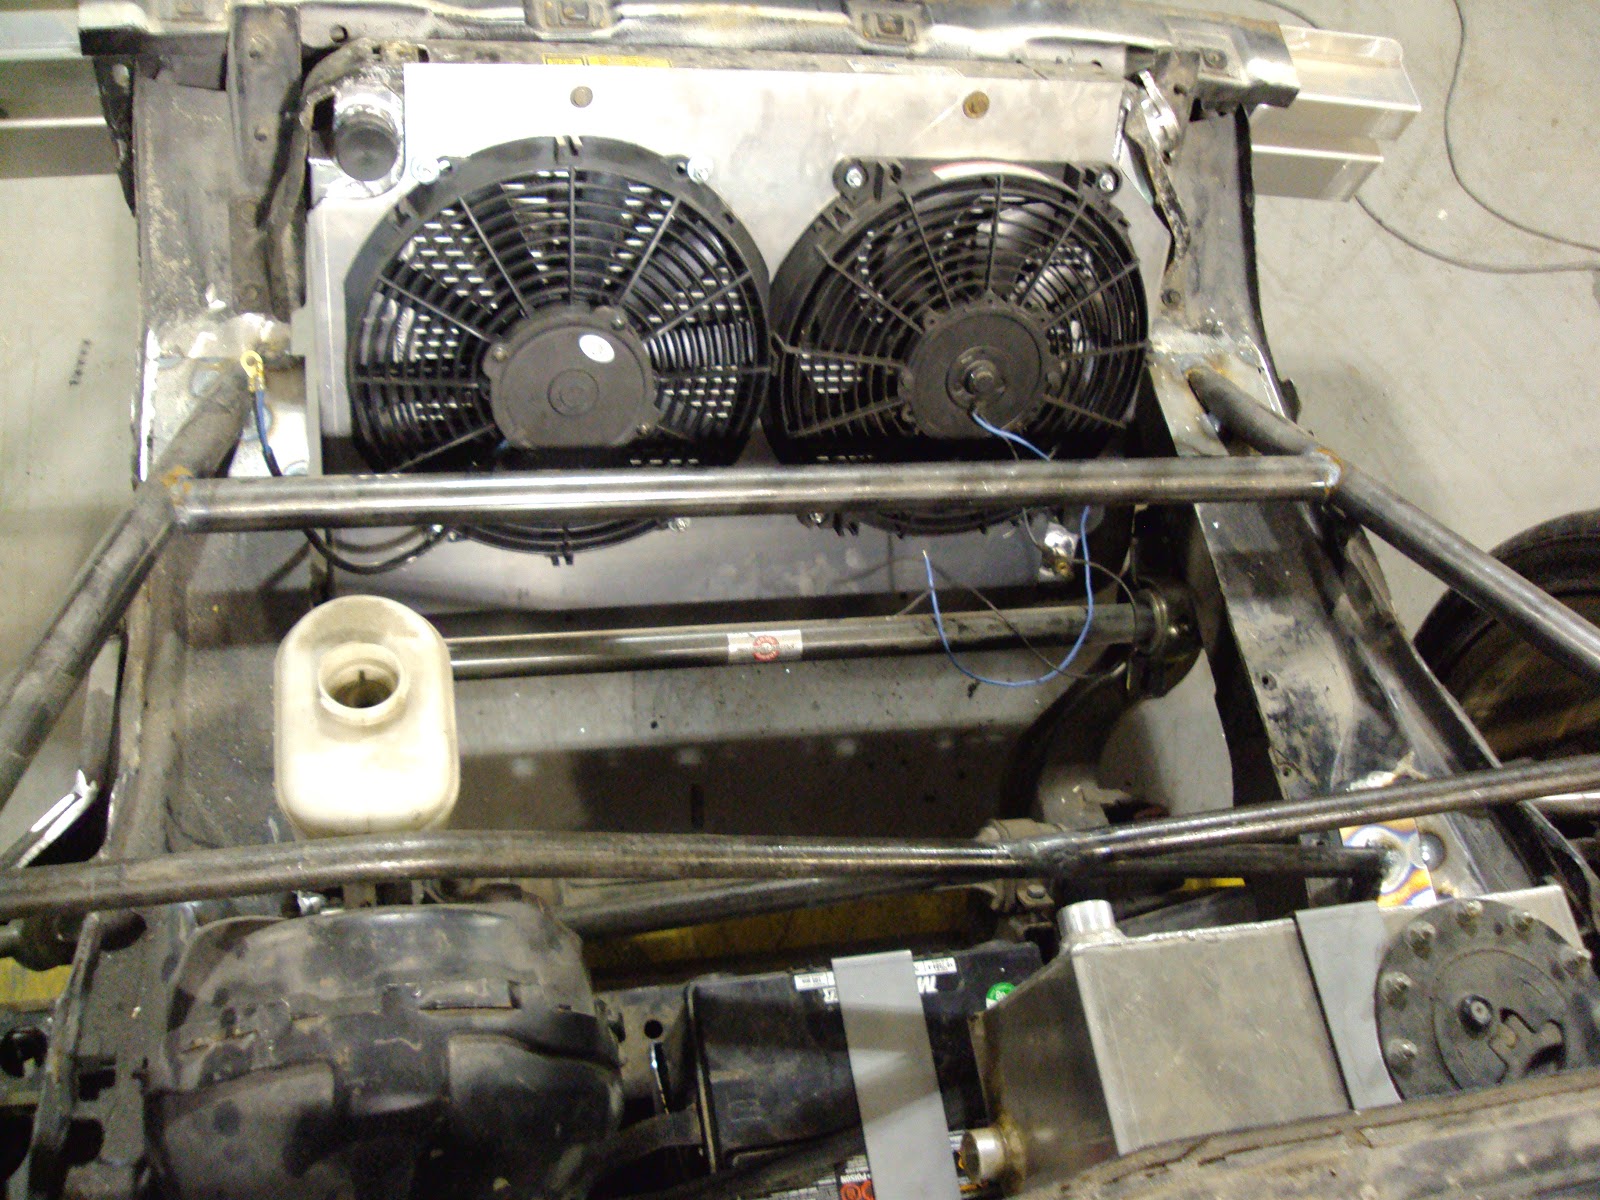
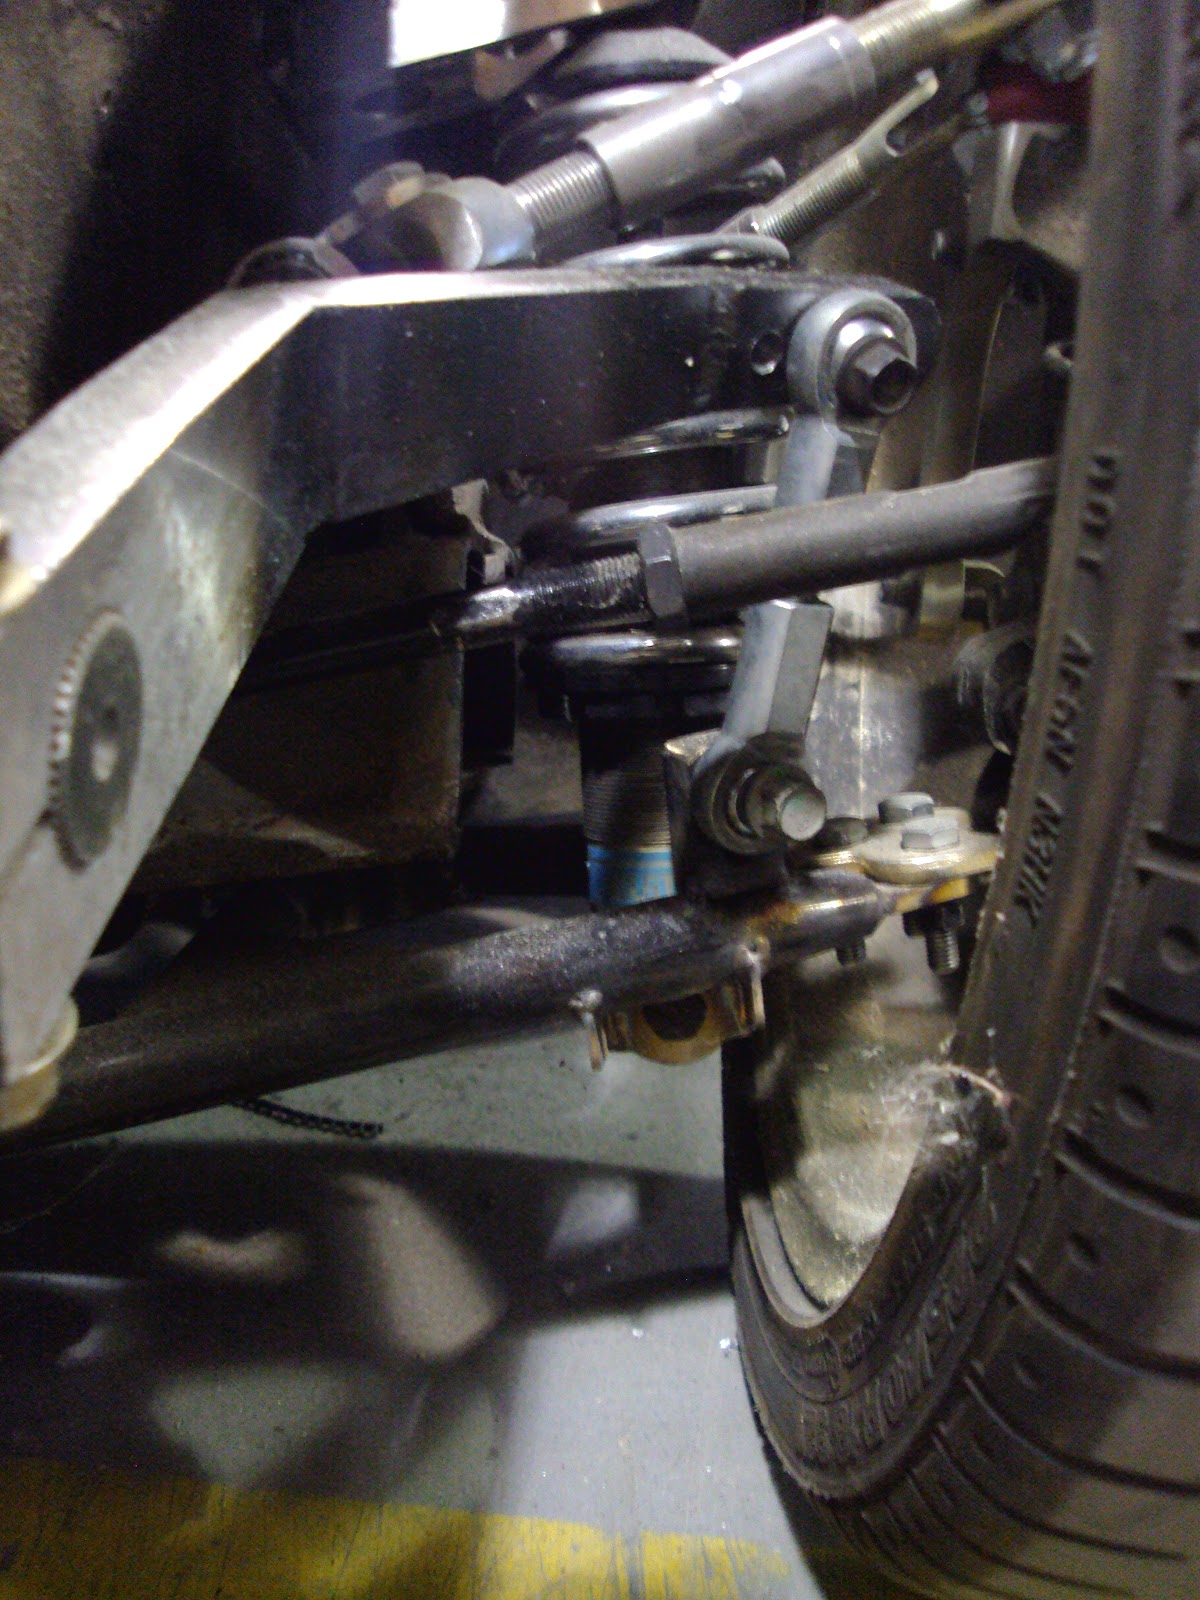
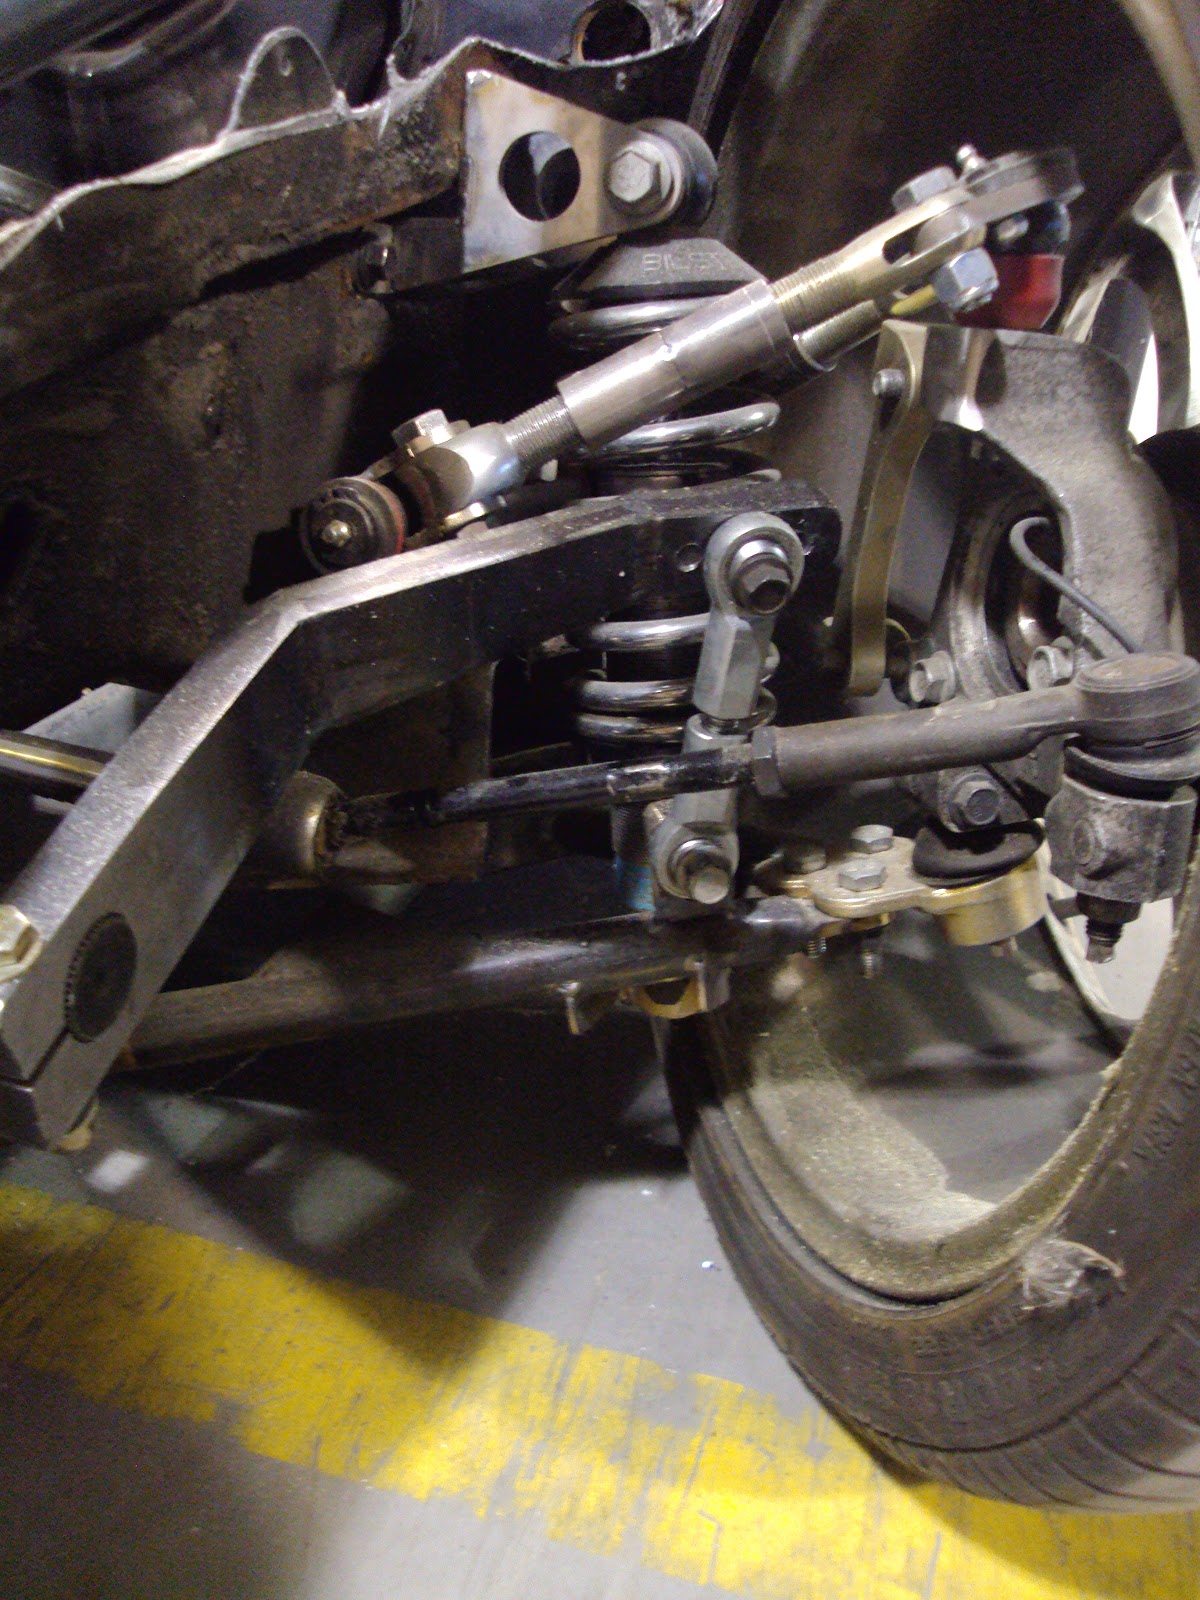
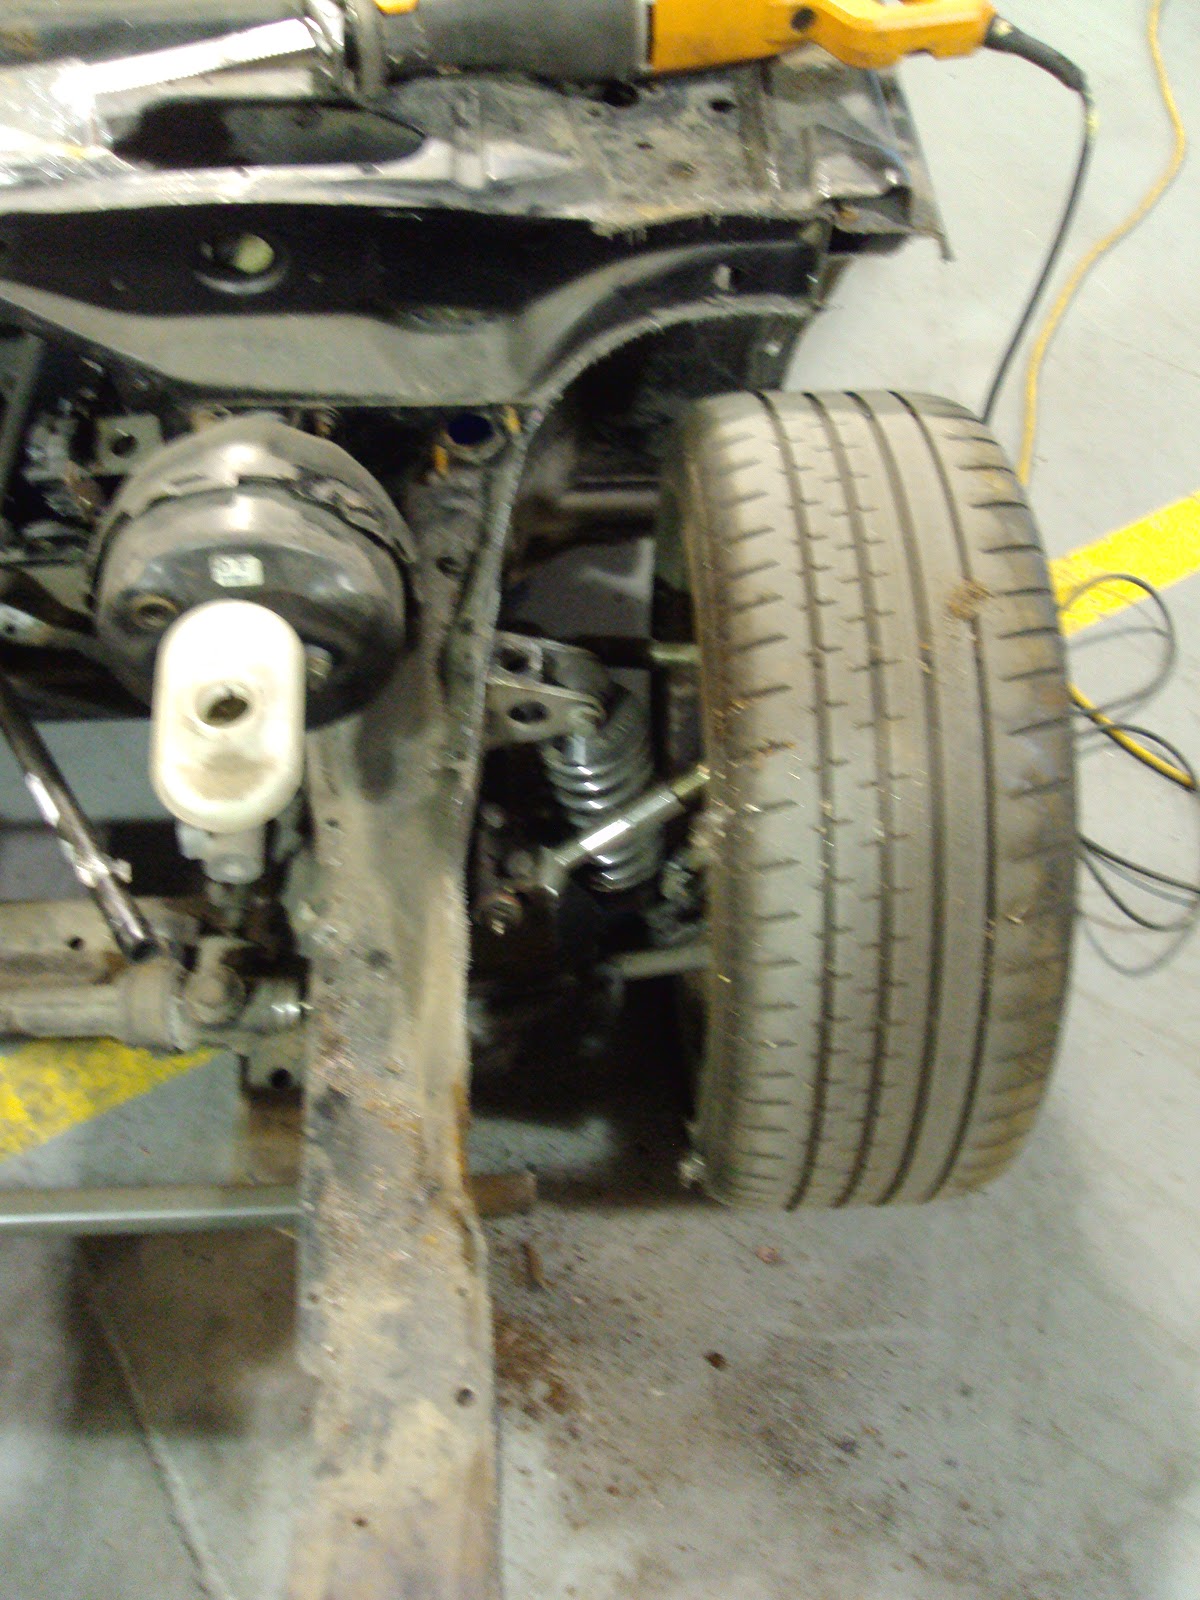
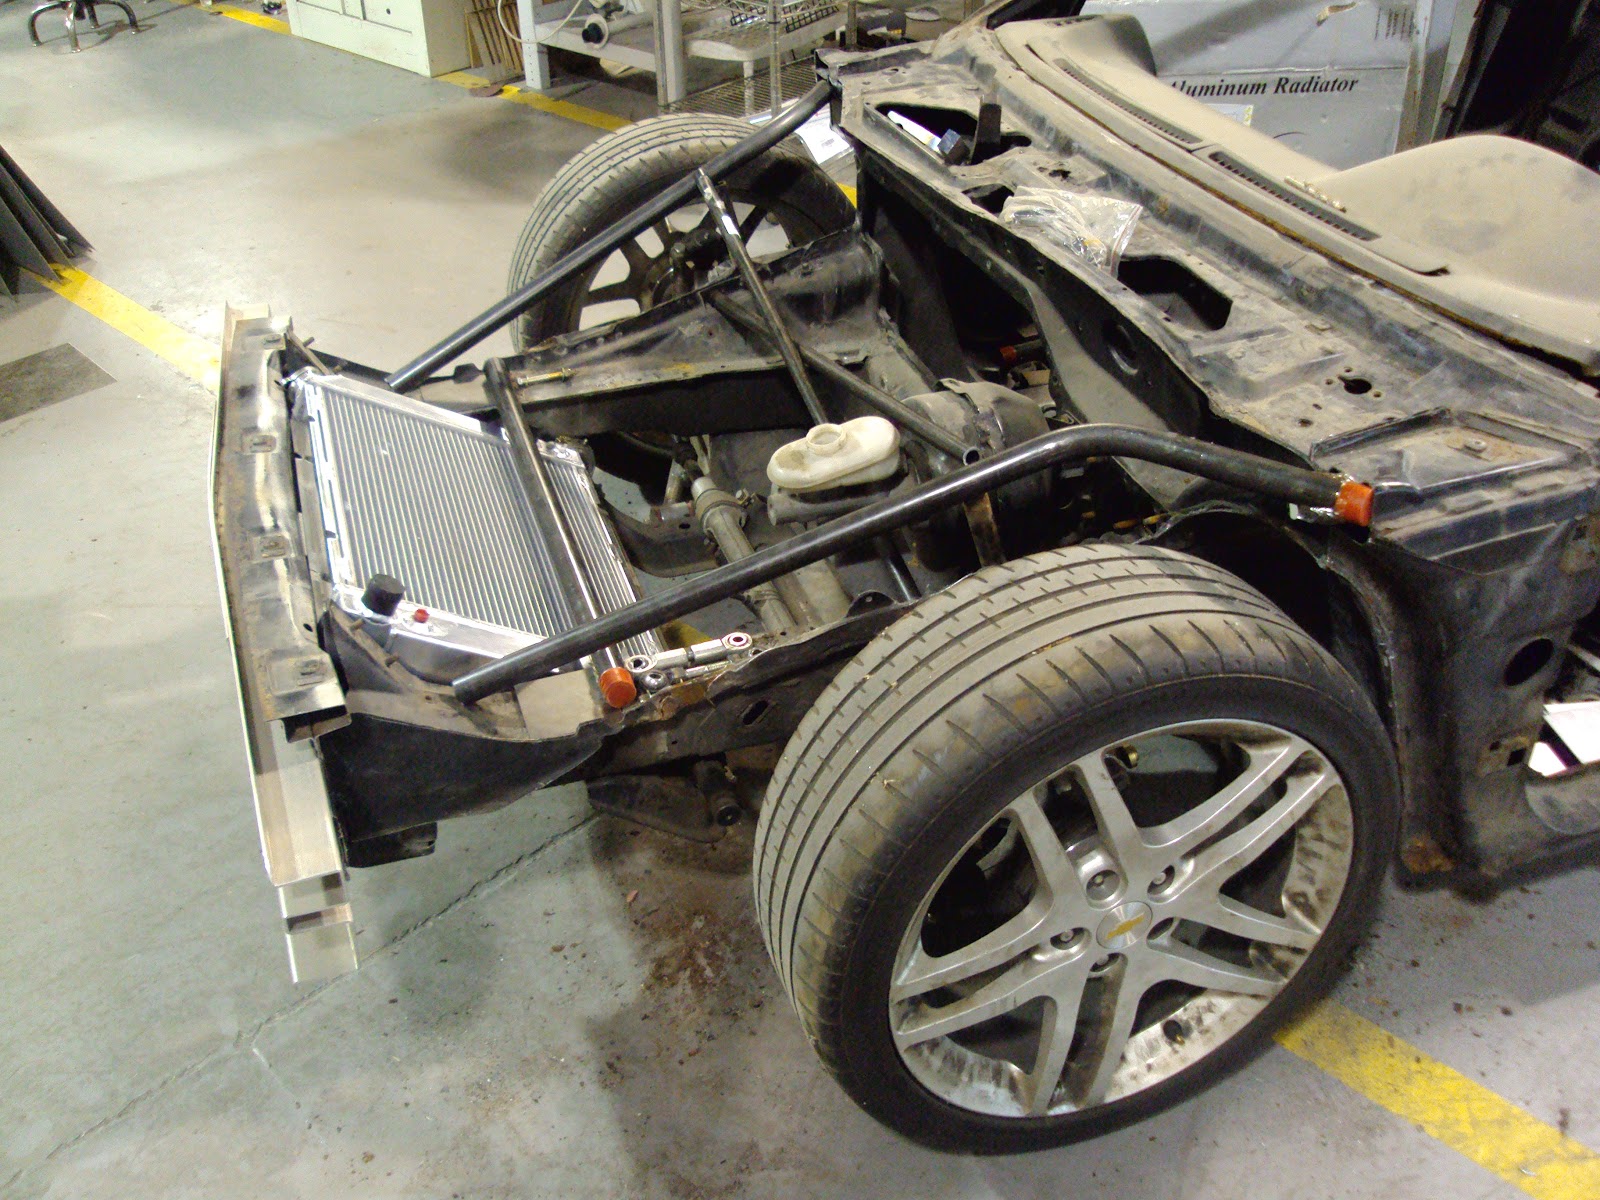
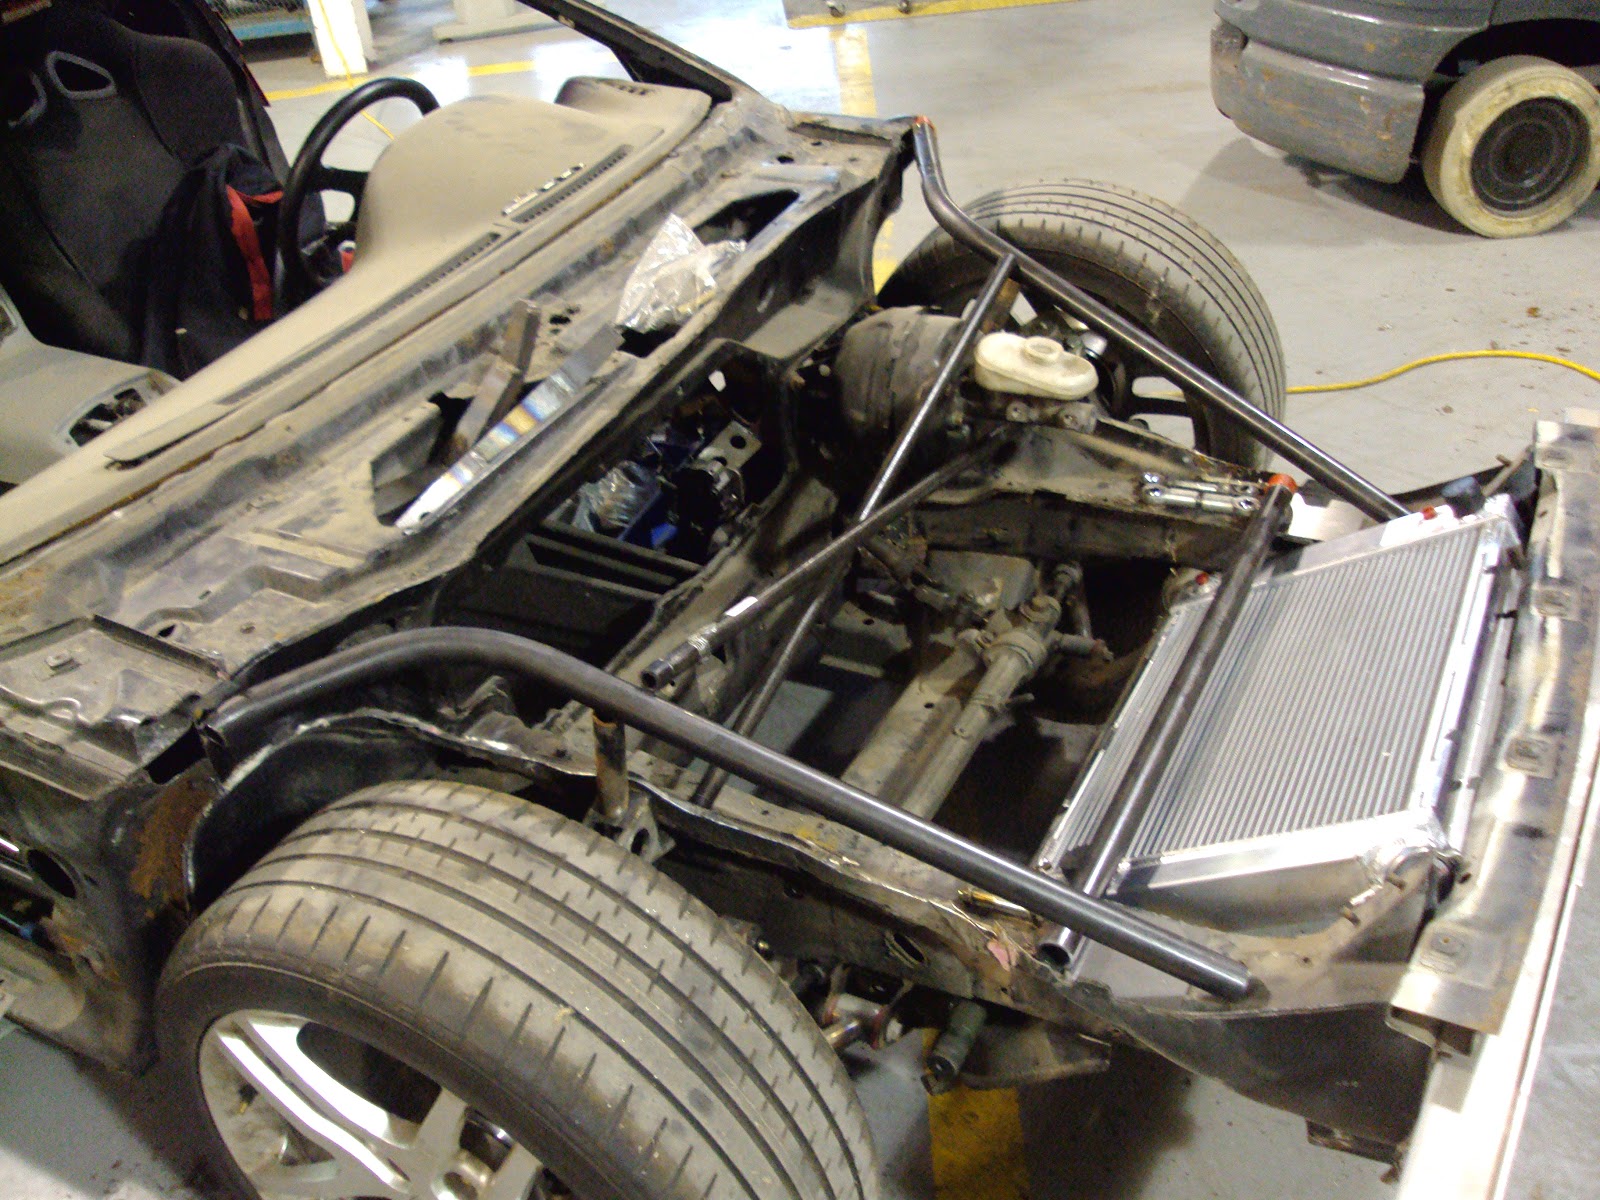
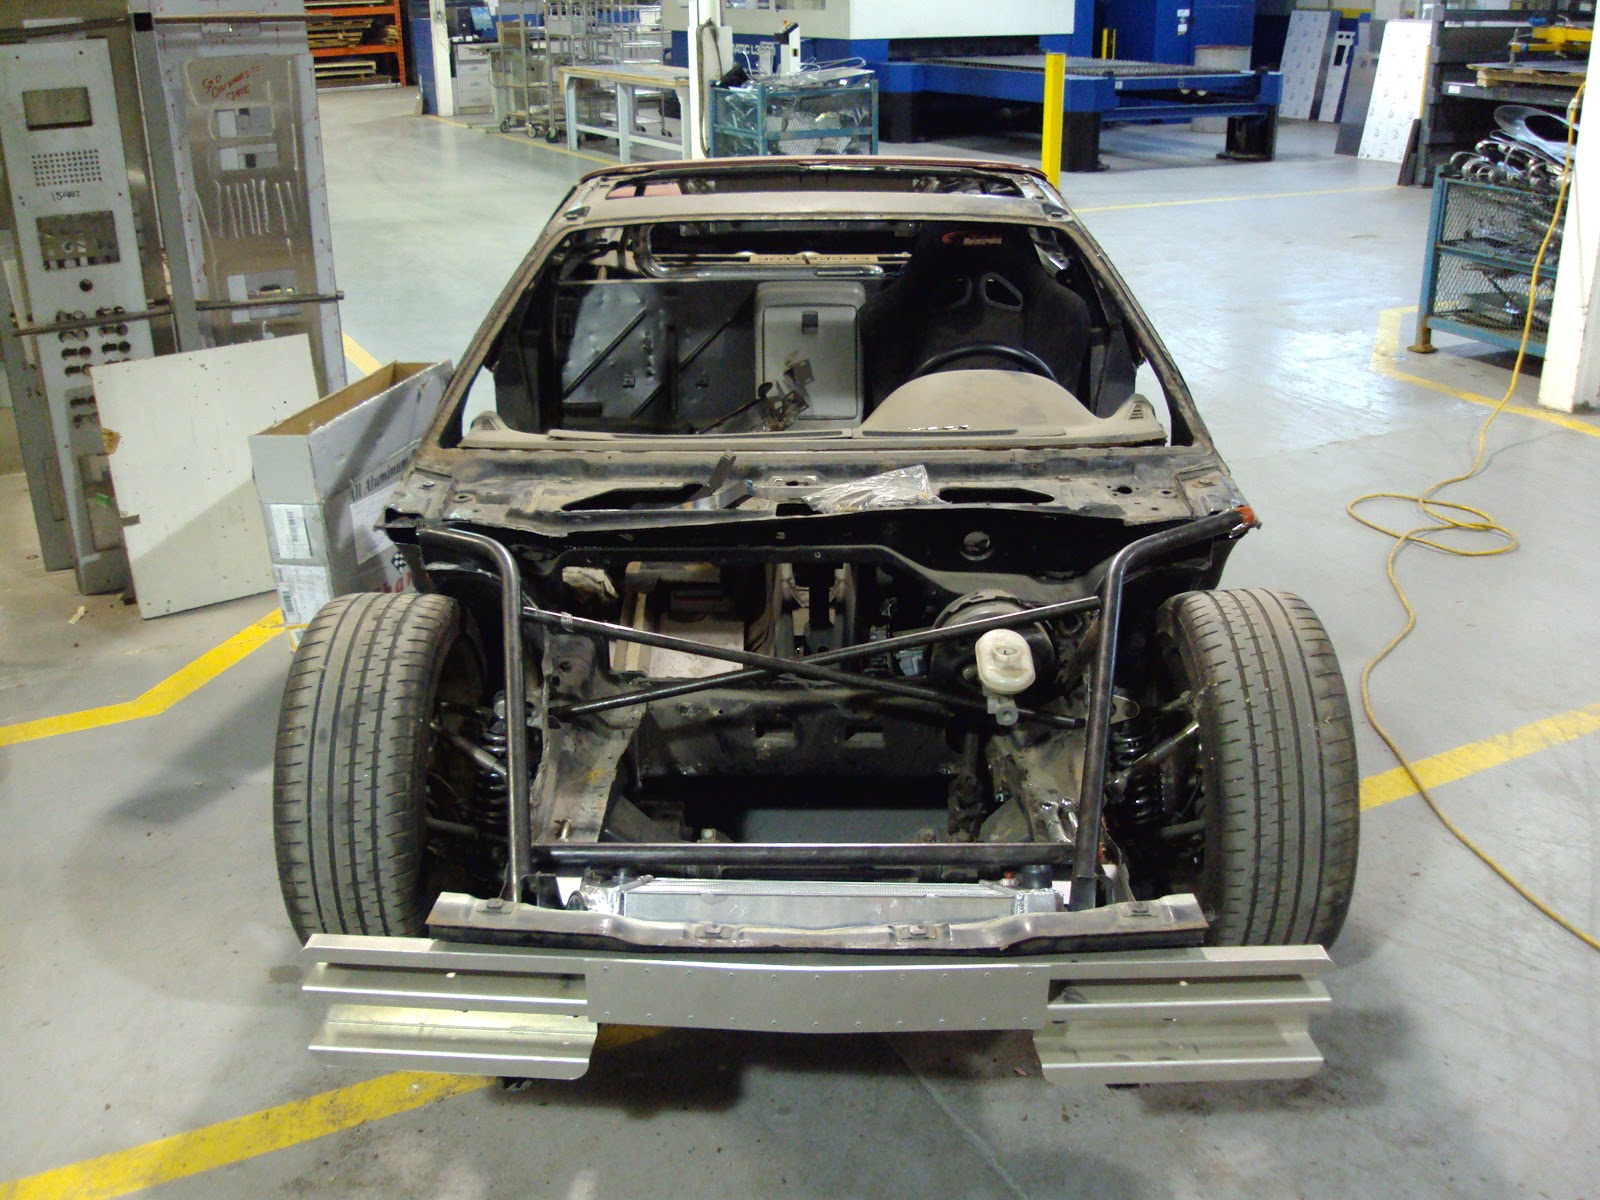
I got the exhaust mock up complete, only thing that I need to finish on the exhaust would be to weld the final bends and tips on, but I'll wait till I have the bumper installed so that I can get it lined up correctly.....and truthfully it's one of the last things that will be done. Also re-made the charge piping which was great cause I removed a 90 degree bend and cut out 16" of piping. I've also removed those crappy racing seats so I can use stock Fiero seats that I picked up in descent condition. The front suspension fabrication is completed with some plain heim joints for the swaybar endlinks, the actual unit that I use on it during final assembly will be a set of sealed greased units. Lastly I finished off the front end fabrication by installing a battery mount, HVAC blanking plate, meth tank and re-mounted the rad and rad fans.

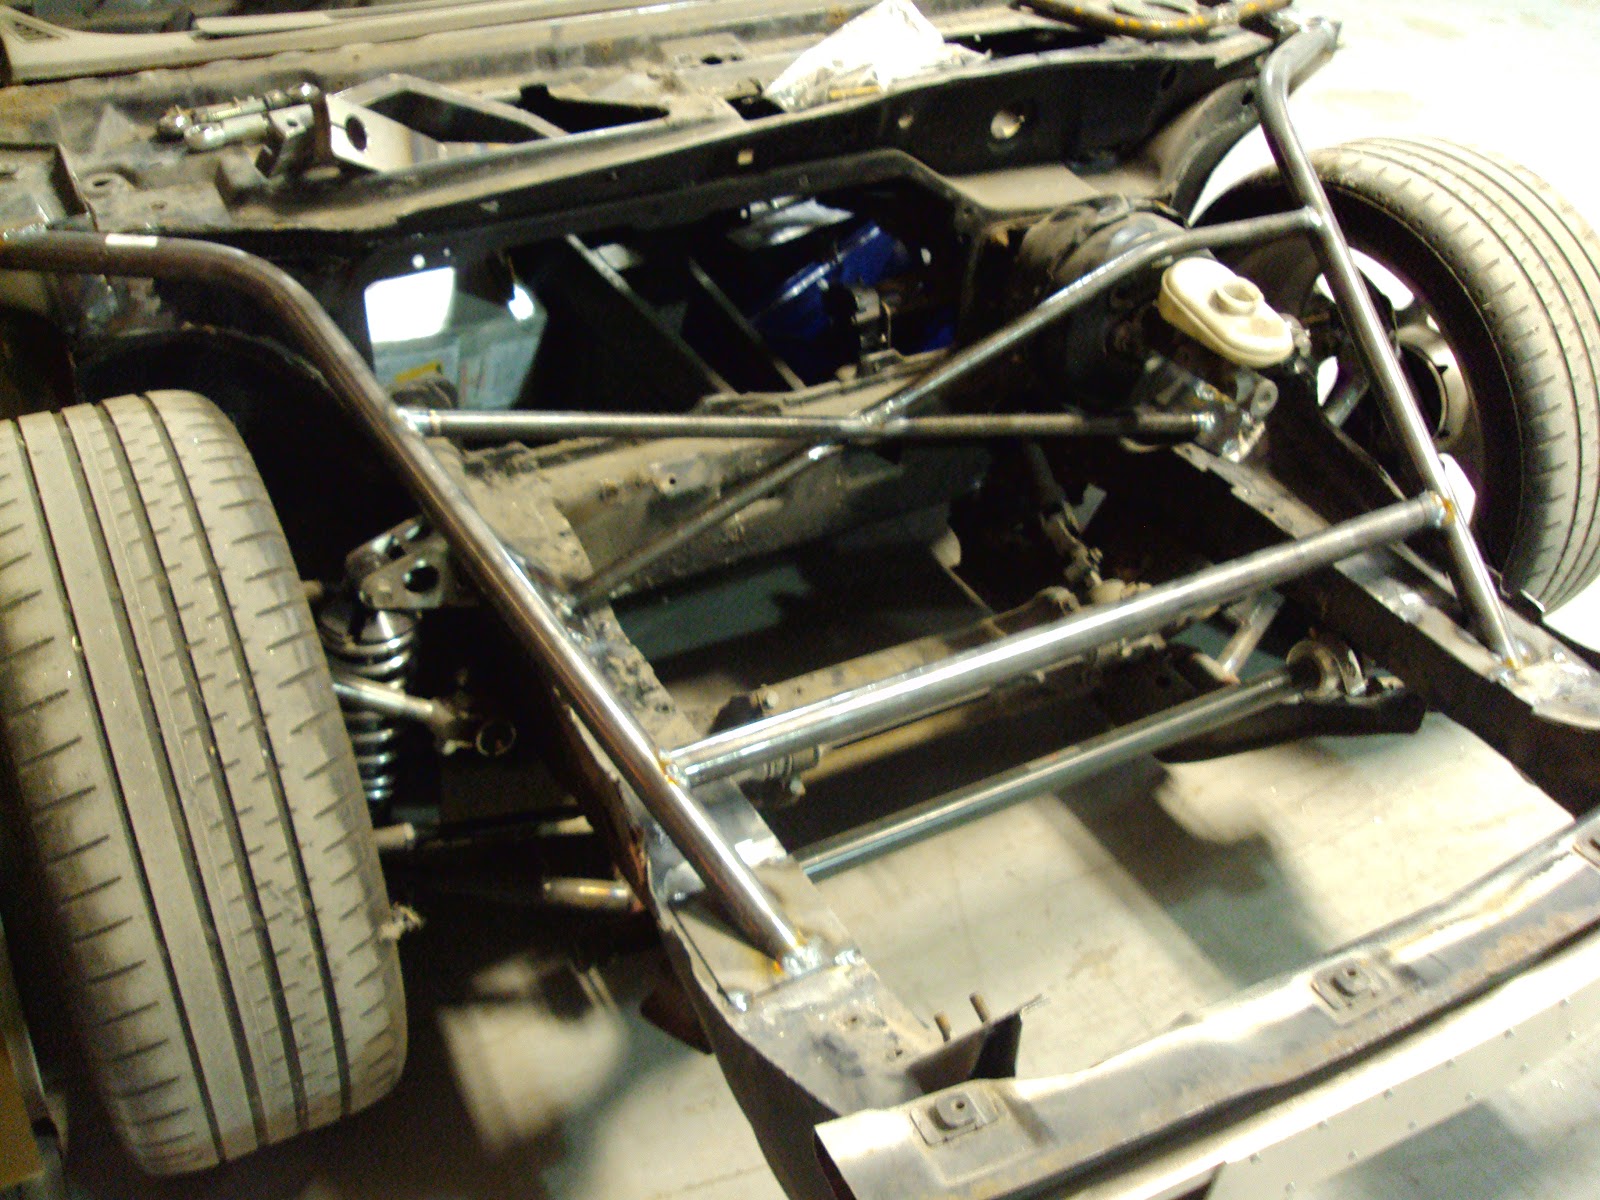
I'm really pleased with how its coming, a couple things that I didn't like I've removed or rebuilt, everything seems to fit well and the car doesn't seem to have any issues with suspension movement, axles, engine and trans.

There are a couple things that I am going to look at changing with the brake setup, but its mostly with the calipers and that can be looked at when the suspension is off the car.

On to some pictures.


Trying to keep it going updates

The countdown is now on, I'm trying to get the car tack welded together and all the major fabrication done for the end of the year. Come Xmas and New years I'm going to tear down the car and send the chassis to blasting or acid dip (haven't figured out which one yet).

This past week I got more front end tubing done, figured out where I'm going to put the battery tray, also went back to the exhaust system and tore apart the turbo setup. I didn't like the location and fit of the turbo downpipe and mufflers, everything was really close to the engine, driveshaft, water pipe and motor mount, I took a second look at the system to come up with a better design. I think the final design is going to change the rotation of the turbo and will be going with a camero style muffler and factory location for the exhaust pipes. But changing the turbo setup caused a problem with the location of the methanol tank, so I'm going to re-locate it to front of the car. Lastly I drilled the and tapped the endlink mounting locations on the swaybar arms, I'll get the links installed tomorrow.

Still to do, need to mount the rad, rad fans, fabricate the battery tray, meth tank tray and HVAC blocking plate..........then the fun time of dismantling everything I've built and finish welding of everything.


Back at it

Finally got around to doing some metal work this weekend.........while I was broken down I got to thinking about the car a bit more, decided on a few things and one of those what in regards to the front end. I got tired of lifting the car to look and play with the front suspension, so I decided to cut off the upper frame members, wheel well liners, headlight supports, etc etc. With this decision I also realize that there isn't any support for the fenders, bumper, hood so I'll be building a one piece front clip using the stock pieces.

After looking at the stock sheet metal I realized that there is a significant frame support there as well, so I aimed to help the support of the chassis in a similar fashion that I did in the rear end with tubular steel. I got a few tubular pieces and the mounting plates welded in before I had to stop, enjoy the pics.


Wiring update

Just a quick update on the wiring spiders web, I got most of the ION wiring harness cleaned up and traced back to the fuse panel or computer, I was trying to get every sensor, connector or wire coiled up all the way to the fuse panel or computer but unfortunately there is many connections that have wires that go to both components, so there is no way to coil it past a certain point. This is going to make the wiring a little more confusing during the next stage, but as long as I do it wire by wire I should be fine. I did end up stripping out all the factory stereo wiring, plus I've found a couple wires that weren't used or I don't need in the Fiero that I might be able to re-purpose into wires for aftermarket gauges. The fun part is going to be when I finish with the factory wire and I need to run the main power wire, aftermarket stereo wiring and all the new wires for the aftermarket gauges, mostly because I want it all to look factory so I am going to need to get some or re-use some GM watertight connectors for all the extra wiring.


Rebuilding the wiring harness

It's been a while since I could work on the project car, started with the car that takes me to work everyday requiring a new engine plus some other upgrade parts that I wanted to do. Then I broke my leg which has been a 9 week ordeal..........but I'm back at it, I can't really do to much just now on the frame since I still have limited mobility, so I started working on the wiring harness.

First I started off by cleaning the basement a bit, since I need all the floor space to lay out the factory Fiero harness, one thing that I found is that the Fiero harness has a lot of lines that cross over each other in the dash area, for example the power window buttons run on a separate line from the main line that runs from the fusebox to the engine bay, I hope to clean that up a bit when I modify the ION harness.

After laying out the Fiero harness I started working on the ION harness, I thought about just laying the ION harness on top of the Fiero one, then cutting and hacking to the different lengths, but I realized that won't work too well with all the wire protection tape/loom in the way, so I started off by hanging the ION harness from the ceiling and removing all the wire protection off the harness. In this way I can start off the modification by locating the main interior fuse panel in the desired location on the Fiero harness, then connector by connector and wire by wire tracing the exact route that the harness is going to follow ending up at the proper location in the Fiero harness where I can trim or lengthen the wires to suit and use either the Fiero or ION factory connector to the desired part.


This process is probably going to take a few weeks in the evenings/weekend, but it should end up with a nice clean harness that "should" line up nicely in the new car.