Quick update today, sorry it has been so long since the last update, I've been busy the last few weeks between work, life and the daily driver rebuild.
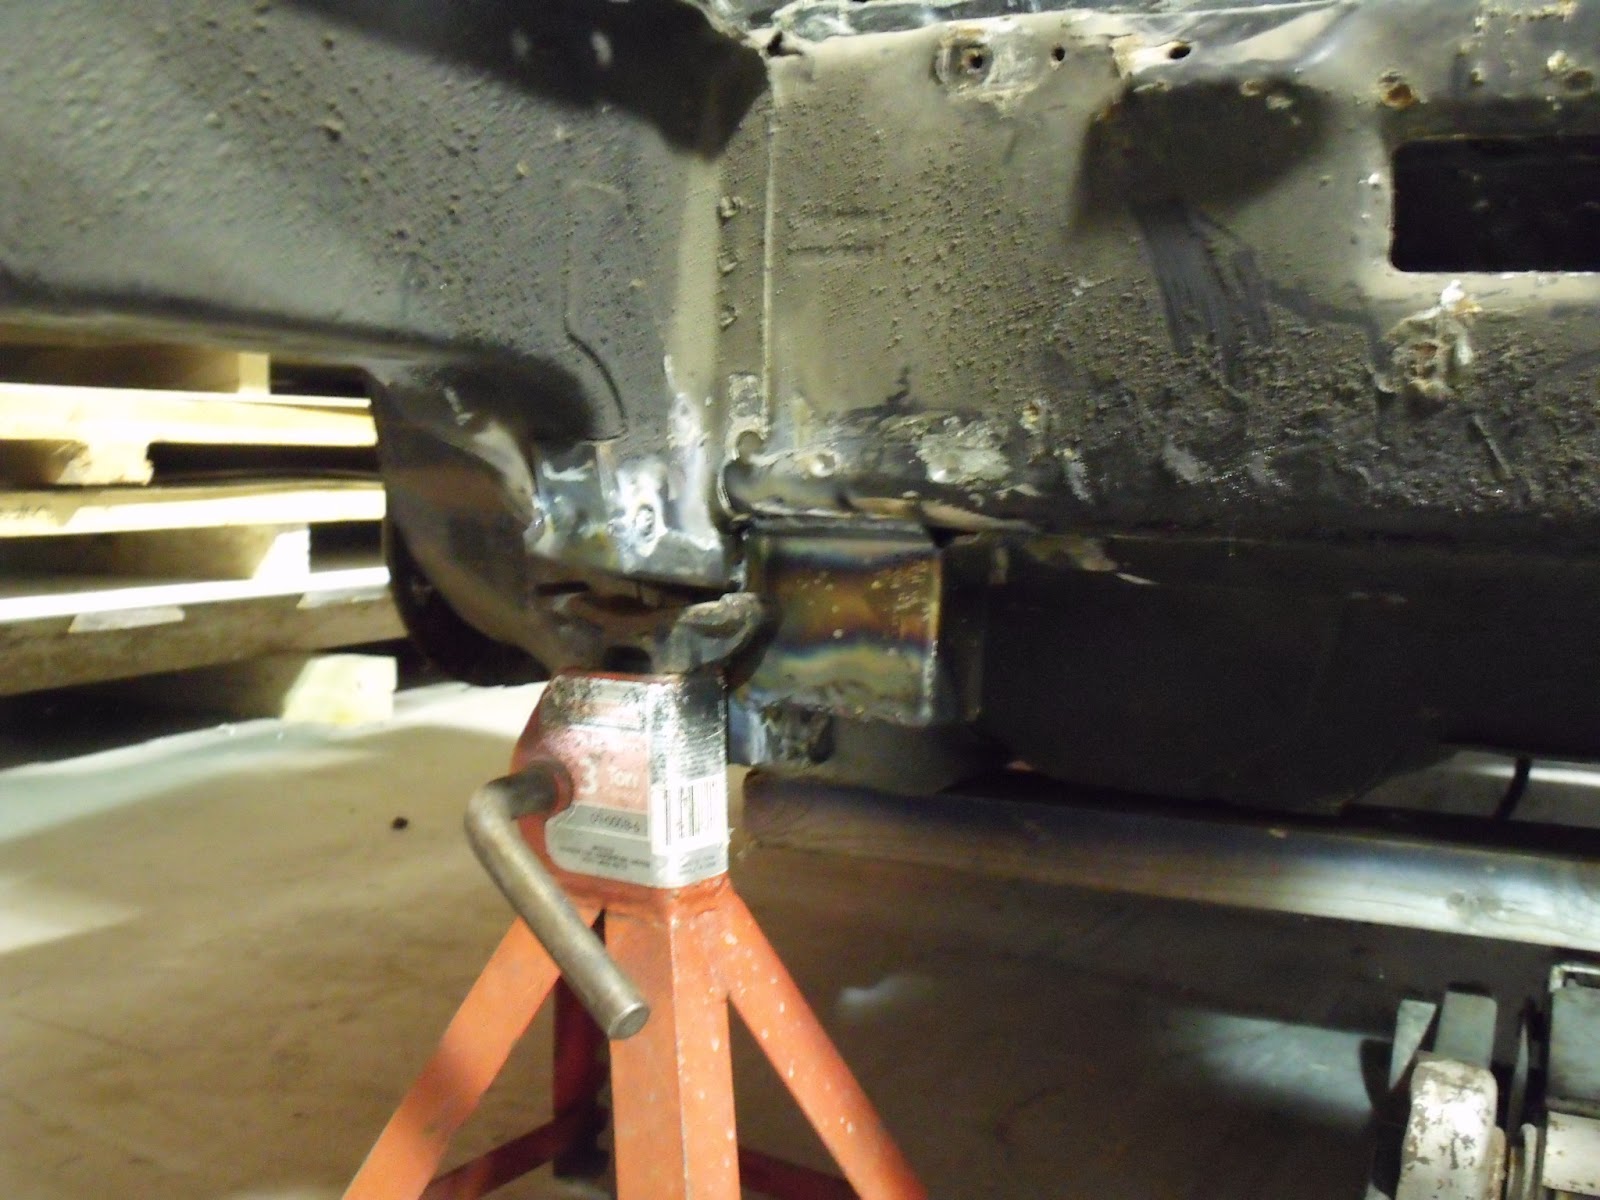
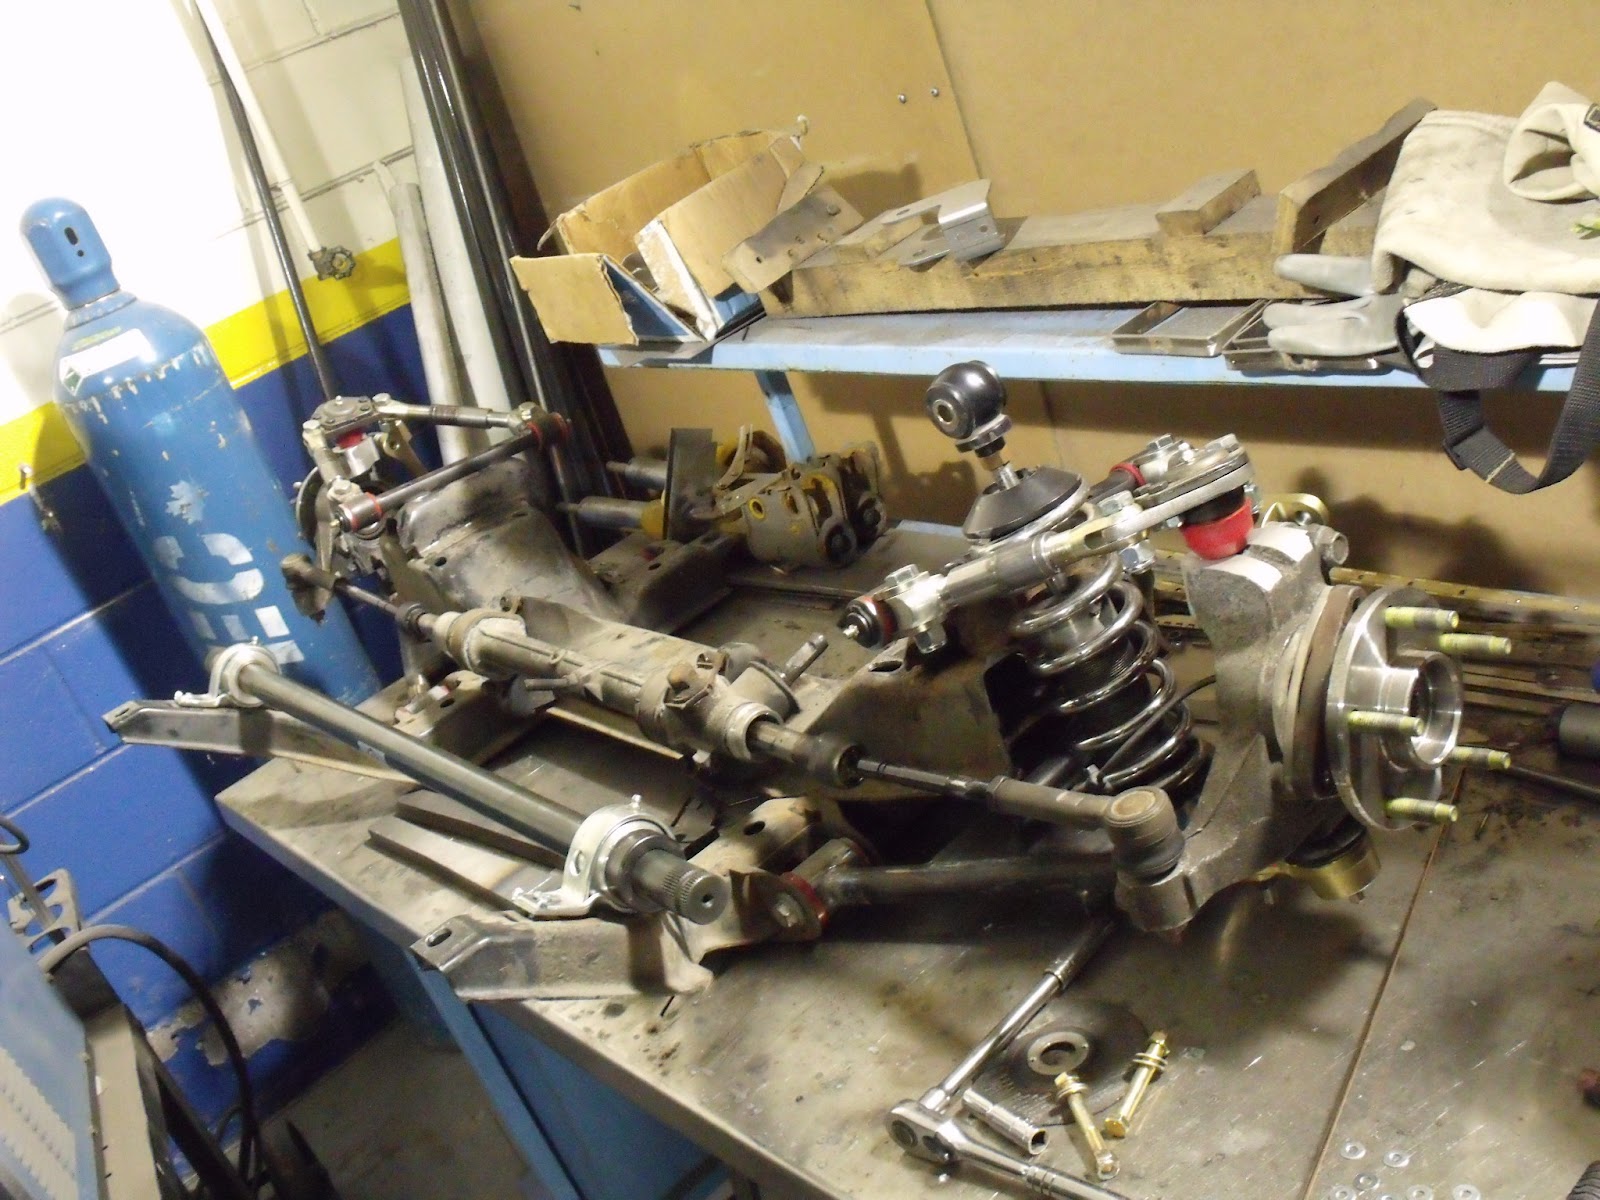
This past weekend I got the 85 chassis trimmed and added the rear mounting location for the 88 front subframe, also started putting all the other components on the front subframe. Today I welded filler pieces on the upper control arm mounting location, also mocked up a couple places to mount the swaybar, not sure but I might mount the swaybar on the bottom of the subframe instead in the stock location......only reason why is I think I can get a longer arm and possibly have more clearance for other components in the front suspension. I will try mocking it up a bit more before I make it a permanent decision.
Now for some pics
Apa itu TSER dan mengapa memegang peranan penting dalam Spesifikasi Kaca Film
Melanjutkan pembahasan tentang Spesifikasi Penting pada Kaca Film, kali ini akan dibahas lebih detail tentang Spesifikasi TSER pada kaca film.
Seperti yang sudah dibahas pada artikel sebelumnya bahwa TSER (Total Solar Energy Rejected)
adalah persentase total solar energy (heat/panas) yg di tolak oleh kaca film. Semakin besar persentase TSER semakin baik, krn menandakan kemampuan kaca film u/ menolak panas yg masuk melalui kaca film secara total.
Seperti yang sudah dibahas pada artikel sebelumnya bahwa TSER (Total Solar Energy Rejected)
adalah persentase total solar energy (heat/panas) yg di tolak oleh kaca film. Semakin besar persentase TSER semakin baik, krn menandakan kemampuan kaca film u/ menolak panas yg masuk melalui kaca film secara total.
TSER adalah akumulasi % dari berbagai variable penyumbang panas yg masuk melalui kaca, termasuk Infra-Red (IR) yg merupakan salah satu variable terbesar didalam TSER.TSER tidak dapat mudah di ukur, harus melaui test lab untuk spec TSER yg valid, acuan pengukuran TSER terdiri dari beberapa variable yang secara logic dapat di telaah apakah spec yg dipaparkan logic atau tidak.
TSER secara umum adalah akumulasi bbrp variabel terdiri dari:
IRR = 50%
VLT = 40%
UVR = 3%
Variabel lain = 7% (spt: bahan dasar, teknologi, proses pembuatan, etc)
TSER secara umum adalah akumulasi bbrp variabel terdiri dari:
IRR = 50%
VLT = 40%
UVR = 3%
Variabel lain = 7% (spt: bahan dasar, teknologi, proses pembuatan, etc)
%TSER dari Variabel VLT sebesar 40% adalah tetap sesuai dengan kegelapan Kaca Film, bila %VLT sama maka dapat diasumsikan sumbangan terhadap %TSER adalah sama. (note: semakin besar %VLT maka sumbangan terhadap %TSER semakin kecil)
Sedangkan %TSER dari UVR sebesar 3% sudah umum krn semua Kaca Film Branded umumnya memiliki spec UVR 98-99.9%.
Dengan demikian yang memegang peranan besar dalam TSER adalah spec IRR dan Other Var, IRR dapat dengan mudah diukur dengan alat digital transmittion meter, semakin besar %IRR maka sumbangan terhadap %TSER semakin besar, maka dengan demikian dapat dg mudah melihat apakah spesifikasi TSER yg diclaim/dipaparkan masuk akal atau tidak.
Jadi agar anda tidak di kelabui oleh spesifikasi yang diclaim oleh sebuah merk kaca film, maka bijaklah dalam menerima informasi spesifikasi kaca film.
Bagi yang membutuhkan konsultasi lebih lanjut u/ memilih kaca film, jangan sungkan menghubungi Monza Autosport di (+62-21) 688 36 360 / 9999 5600
[Chris ~ Monza Autosport]
[Chris ~ Monza Autosport]
Front suspension rebuild part 2
Quick update tonight, actually I'm a couple days late, this update is for last weekend.
I got the original suspension removed from the car and I started test fitting the 88 subframe member, over the last couple days I've drilled out all the spot welds on the 84-87 rear brackets that need to be removed and cut the space frame to clear the 88 subframe, tonight I bolted in the frame to design the new rear mounts and the patch required to fill the section that was cut out of the space frame. I also started by test fitting the lower control arms and tomorrow I will bolt in the steering knuckle, take some measurements of the suspension height and design the coilover brackets......hopefully I can get it drawn and lasered tomorrow so I can do some welding this weekend, although I don't know when I will get to that since I am going to be picking up a 88 for parts on Saturday and working on a friends stereo on Sunday. Hoping to get the whole new front suspension setup completed by the end of February. Now for a couple snap shots, I'll have a few more on the weekend.
Front suspension rebuild part 1
So after I got the wheels on I decided to do a 88 style front frame and suspension, there was a couple reasons, main one was that I didn't 100% like the way the one I built turned out. What I built should work, but there was a couple nagging issues/design imperfections that I didn't want to live with, so a local member had a 88 front frame laying around that I grabbed and now I am going to rebuild everything in the front end.
Over the last week I measured up the stock 88 lower control arm, did a design in autocad and built it today. I am very pleased in how it came out, took about 2.5 hours to build and weld this unit up, there is only one small thing that I want to add to beef up the spring mount area, although its probably strong enough right now. The best part is, I put the stock LCA on the scale, tipped it at 9.8lbs with the ball joint and rubber bushings installed, my LCA comes in at 4.6lbs without the ball joint and bushings, even loaded it looks like mine is going to be 50% weight of the stock unit.
Lastly I got the final gauge pod tack welded together for the center HVAC location, 8 gauges in the center console but I still need to find room for one more, need room for the interceptor.
Over the last week I measured up the stock 88 lower control arm, did a design in autocad and built it today. I am very pleased in how it came out, took about 2.5 hours to build and weld this unit up, there is only one small thing that I want to add to beef up the spring mount area, although its probably strong enough right now. The best part is, I put the stock LCA on the scale, tipped it at 9.8lbs with the ball joint and rubber bushings installed, my LCA comes in at 4.6lbs without the ball joint and bushings, even loaded it looks like mine is going to be 50% weight of the stock unit.
Lastly I got the final gauge pod tack welded together for the center HVAC location, 8 gauges in the center console but I still need to find room for one more, need room for the interceptor.
End of the year updates
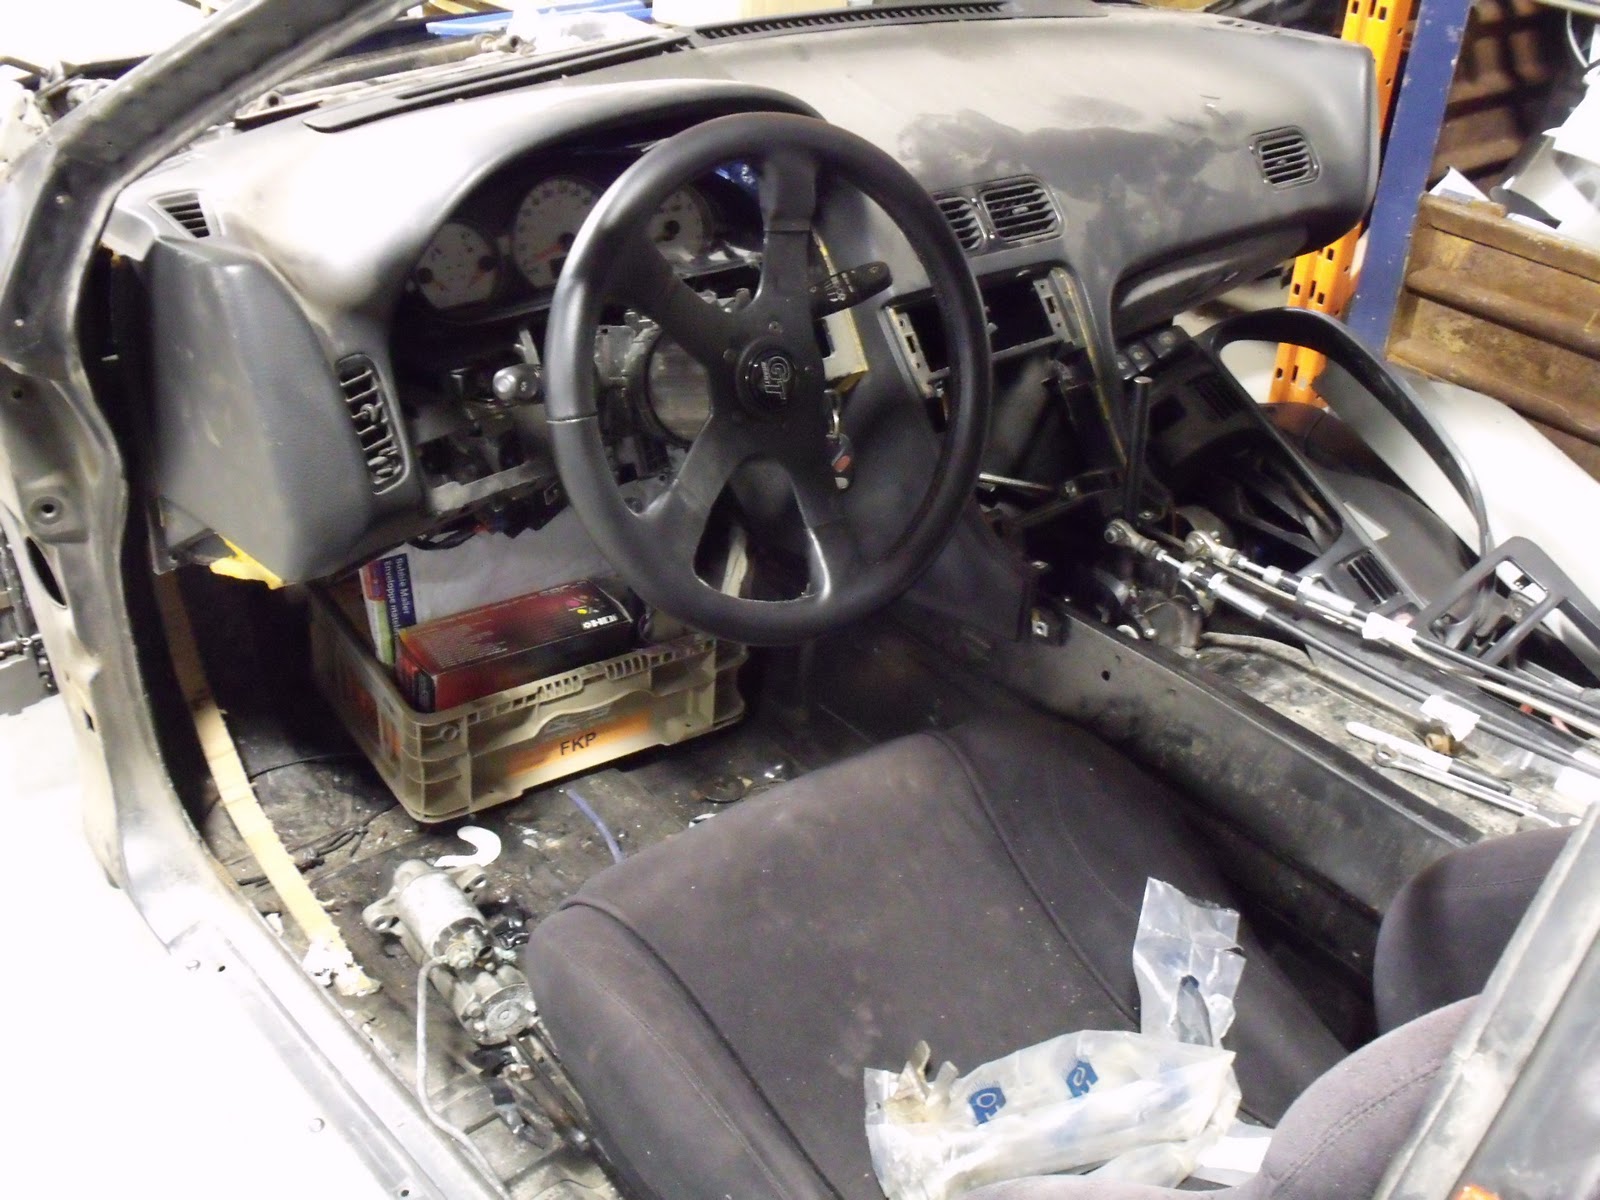
Been working on the car over the last few days since the shop is on Xmas shutdown, its been nice cause I've gotten a few things done, mostly with the shifter, interior bits and pieces, finished modifying the brake/clutch and mounted the gas pedal. What I didn't get done was the front suspension, I was looking to finish it but since I ran into steering geometry issues I've been leaning and looking into doing a 88 suspension swap. I will have a 88 front cradle coming in early next year and I'll be rebuilding it all again, but that's another story, this is about what I did over the last 3 days.
First I started with welding the shifter bracket in place, I needed to move it since the 240 dash was interfering with the location of the stock bracket, once I got that located then I needed to work on the shifter cables, I opted to get rid of the stock ION cables for something a little easier to adjust and stiffer mounting, from my local idea store (Princess auto) I found cables, but after fooling around with them last week I noticed a fundamental problem, the cables although really nice had a problem with it not being able to allow for flex, they were too rigid. So I had to "dismantle" them, and the stock GM cables, removing the plastic shaft with ball joint that allowed the stock cable to move with the pivot action of the shifter and transmission links. After fighting all day with them I finally got them done and installed on the shifter housing, the next day I tackled the transmission mounting and with some fine tuning and adjusting of the cables the system works fairly well, although I am going to have to install a 5th/reverse lockout guide on the shifter housing, but that's a project for another day.
Next I tackled the stock ION brake and clutch switches, it was more simple, just had to cut a couple tabs from the stock ION foot pedal assembly and weld them to the Fiero assembly. The gas pedal since it is a electronic fly by wire system needed a chunk of the stock ION mounting bracket cut off and welded to the Fiero chassis and a re-enforcing bracket be welded to the brake pedal assembly.
I also got a bit more of the rear hatch done, mounted the gas lift struts although thinking about it I might go and grab a pair of linear actuators and have some lifting action put into the hatch. I did get to tackle some alum TIG welding as well, welded up some of the ducting for the intercooler so it will line up with the scoop that I will have to build into the hatch.
Lastly I started welding brackets in place to mount the 240 dash, until now it was just laying in the car with no bolts or support, also started mocking up the center console pieces with a combination of 240 and Fiero plastic pieces.
On to some pics
First I started with welding the shifter bracket in place, I needed to move it since the 240 dash was interfering with the location of the stock bracket, once I got that located then I needed to work on the shifter cables, I opted to get rid of the stock ION cables for something a little easier to adjust and stiffer mounting, from my local idea store (Princess auto) I found cables, but after fooling around with them last week I noticed a fundamental problem, the cables although really nice had a problem with it not being able to allow for flex, they were too rigid. So I had to "dismantle" them, and the stock GM cables, removing the plastic shaft with ball joint that allowed the stock cable to move with the pivot action of the shifter and transmission links. After fighting all day with them I finally got them done and installed on the shifter housing, the next day I tackled the transmission mounting and with some fine tuning and adjusting of the cables the system works fairly well, although I am going to have to install a 5th/reverse lockout guide on the shifter housing, but that's a project for another day.
Next I tackled the stock ION brake and clutch switches, it was more simple, just had to cut a couple tabs from the stock ION foot pedal assembly and weld them to the Fiero assembly. The gas pedal since it is a electronic fly by wire system needed a chunk of the stock ION mounting bracket cut off and welded to the Fiero chassis and a re-enforcing bracket be welded to the brake pedal assembly.
I also got a bit more of the rear hatch done, mounted the gas lift struts although thinking about it I might go and grab a pair of linear actuators and have some lifting action put into the hatch. I did get to tackle some alum TIG welding as well, welded up some of the ducting for the intercooler so it will line up with the scoop that I will have to build into the hatch.
Lastly I started welding brackets in place to mount the 240 dash, until now it was just laying in the car with no bolts or support, also started mocking up the center console pieces with a combination of 240 and Fiero plastic pieces.
On to some pics
Teknologi kaca Film
Teknologi kaca film secara singkat dan dapat mudah dimengerti secara umum dapat dibagi menjadi 3 bahan dasar dan proses pembuatan:
- Metal sputtering – penembakan ion metal (stainless, perak, titanium, etc), metal sputtering dapat dg mudah mendongkrak TSER, tapi metal sputtering memiliki kekurangan sbb:
- Resiko korosif berjalan dengan waktu pemakaian yang dapat menyebabkan seperti ada kabut tipis sehingga visibility berkurang.
- Dapat mengurangi signal GPS.
Metal sputtering sendiri ada berbagai macam proses dan penerapan teknologinya, yang akan membedakan pada kualitas kaca film tersebut, yang artinya tidak semua kaca film metal sputtering bisa sama performa atau kualitasnya, ada yg hanya 1 tahun sudah pudar tapi ada juga yang bisa mencapai 5 tahun untuk kualitas yang baik.
Umumnya kaca film metal sputtering memiliki tampilan reflective (mantul/cermin). - Multilayer Polyester, teknologi u/ mengatasi masalah resiko korosif dan sinyal GPS, tapi proses multilayer polyester memiliki kekurangan dg adanya range spec TSER yg bergantung terhadap sudut cahaya panas masuk.
- Nano Ceramic, teknologi pembuatan kaca film terbaru untuk menjembatani kekurangan pada 2 proses pembuatan lainya, berkembangnya teknologi nano ceramic pada kaca film sehingga menciptakan pencapaian IRR 99% dan TSER lebih baik.Nano Ceramic, menjembatani kekurangan Metal Sputtering dan Multilayer polyester, yg memiliki feature:- Non korosi- Friendly dengan signal GPS- Partikel nano yang sangat kecil memberikan hasil visibility high clarity.- Performa TSER yang stabil.
Its been a busy month, some progress.
Its been a busy one lately, with xmas, family emergency, work and regular day to day life, but I have gotten a few more things started.
Mainly I started doing some dash work with getting the seats semi mounted (this project is on pause right now), when I got the dash mounted I realized the stock Fiero shifter location is directly in the way of the main console, so the shifter had to be moved and re-designed. When I started looking at the shifter assembly I also started looking at better cables which I am still trying to figure out so it might not look 100% correct right now.
Also, I started working on the auxiliary gauge setup in the dash........I've got 8 gauges right now, looking for a place to maybe fit one more, also I am going to have to figure out where to mount the stereo, because there is absolutely no room left in the dash, lastly I got the rims and wheels back on the car, the last month has been really bad for moving the car around the shop on the dolly, the weight of the chassis crushed the rubber wheels and split them open making it next to impossible to roll the car.
Lastly I might have run into a problem with the front steering requiring me to have to re-design the rack mounting location, I'm not getting proper angles one the wheels when turned to full lock..........more work.
Mainly I started doing some dash work with getting the seats semi mounted (this project is on pause right now), when I got the dash mounted I realized the stock Fiero shifter location is directly in the way of the main console, so the shifter had to be moved and re-designed. When I started looking at the shifter assembly I also started looking at better cables which I am still trying to figure out so it might not look 100% correct right now.
Also, I started working on the auxiliary gauge setup in the dash........I've got 8 gauges right now, looking for a place to maybe fit one more, also I am going to have to figure out where to mount the stereo, because there is absolutely no room left in the dash, lastly I got the rims and wheels back on the car, the last month has been really bad for moving the car around the shop on the dolly, the weight of the chassis crushed the rubber wheels and split them open making it next to impossible to roll the car.
Lastly I might have run into a problem with the front steering requiring me to have to re-design the rack mounting location, I'm not getting proper angles one the wheels when turned to full lock..........more work.
Subscribe to:
Posts (Atom)